What the Action can do: This Action lets you do the following:
- It lets you choose to use an interactive Google Map on your site.
Google Maps is a great way to present a location on your website. It allows you to place a fully interactive map on your website, use it to show where your offices are, where an event is being held, where you've just been on holiday.
Previously, Google required you to have an API key to use their Google Maps service - but now you should be able to set up your map using the dedicated Google Maps Action without needing to register or obtain a key. If, however, you have a particularly busy site, Google will let you know if your traffic is greater than their free service allows (which will not be an issue for the vast majority of users).
To use the Action, either click and hold on the Action tool button on Freeway's tool bar, choose Google Maps then draw the Action item on your page, or go to Insert>Action item, choose Google Maps from the list, then resize and reposition the item on your page. With the item selected on the page you can see the options in the Actions palette:
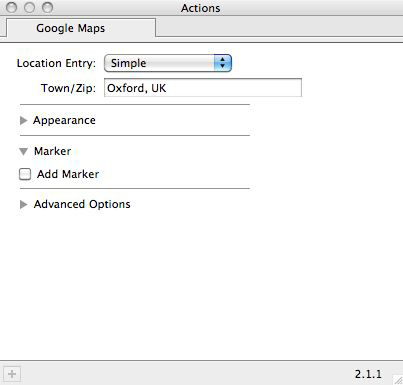
- Location Entry: This popup lets you choose from Simple or Advanced. The default of Simple shows a single field where you can enter a town or a Zip Code/Post Code. Changing the popup to Advanced lets you enter precise Latitude and Longitude values. Note that you can use various online services such as the one at <http://mapmaker.donkeymagic.co.uk/> to plot the latitude and longitude values to use in the Advanced panel.
- Appearance: By default, the disclosure triangle is closed for the Appearance panel, but you can open it to reveal additional options:
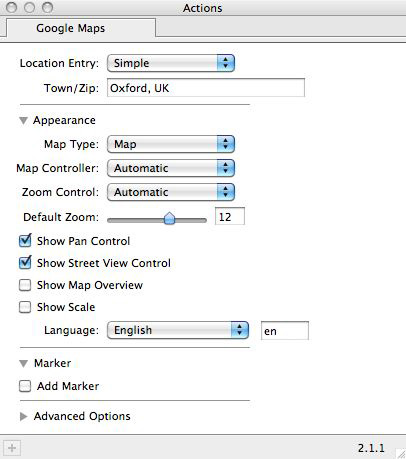
- Map Type: This popup lets you choose from Map (the default), Satellite, Hybrid and Physical - which are the four views offered by Google for the information shown on the map.
- Map Controller: This popup lets you choose how the Map Type controller will display on the map or if you wish to remove it. Choose from Automatic, Horizontal bar Dropdown Menu or None.
- Zoom Control: This popup lets you choose how the Zoom Control buttons display on the map or if you wish to remove it. Choose from Automatic, Large, Small or None.
- Default Zoom: You can choose what scale the map is zoomed to on page load by choosing the scale on the slider (or by entering a value between 1 and 18 in the value field).
- Show Pan Control: When a Google Map is used at a large size on a web page, you might see the "Pan Control" button appear (which is a round button with up, down, left and right arrows on it) that lets you click on the direction arrows to move the map area. This option lets you show or hide the Pan Control button.
- Show Street View Control: This option lets you show or hide the Google Street View button on your map (the button of a man in a white rectangle).
- Show Map Overview: This option lets you show or hide the Map Overview (which is a small box in the bottom right corner, which displays a larger scale overview of the area the main window is currently displaying.
- Show Scale: This option lets you show or hide the Scale bar on the map.
- Language: This popup controls the language in which the small print ("Terms of use", error reporting, etc.) displayed on the map will appear in.
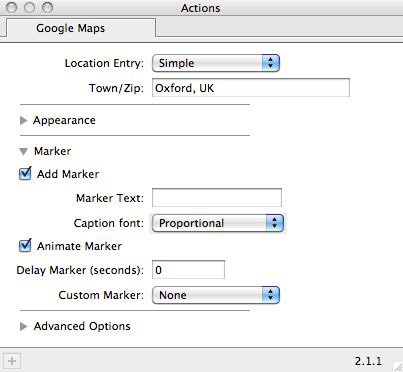
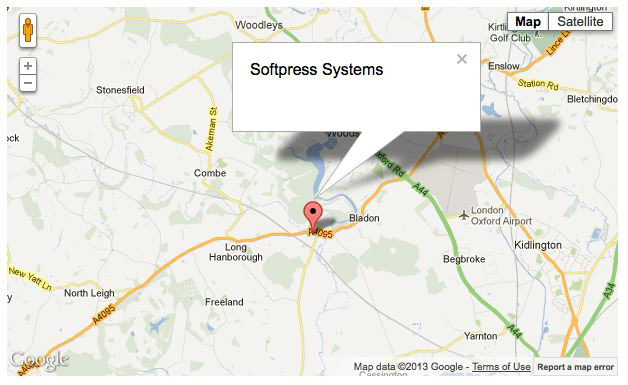
- Add Marker: Enter the text you wish to use for your Google Map Marker. Preview in a browser to see that there is now a marker (a red disk with a pointer) as well as a marker panel (shaped like a speech box) containing the text you entered.
- Caption font: Choose the HTML text font you want to use for your Marker text in this popup.
- Animate Marker: Show or hide the animation for when the marker point appears on the page (which bounces quickly as it jumps into place).
- Delay Marker (seconds): Choose to have a delay before the Google Map Marker appears by choosing a value in seconds in this field.
- Custom Marker: If you prefer to use a custom graphic as your Map Marker, you can choose a graphic that's stored on your hard disk by clicking and holding on this popup, choosing Select…, navigating to the graphic file and clicking Open.
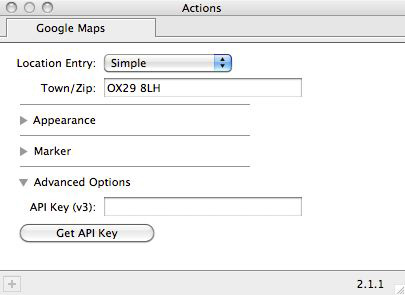
Google regularly updates its "API keys" (which let you and Google track the usage of your map), and the latest version is version 3. With this new version you only need to enter the key if you wish to track the statistics of visitor usage or if you believe you may have so much visitor traffic that you require a key from Google - check the Terms and Conditions on Google's site at <https://developers.google.com/maps/terms> to see if you need an API key, but at the time of writing Google offers free use up to 25,000 map loads per day. For most Freeway users, you won't need an API key, but we have offered this facility as an advanced option.
- Click on the Get API Key button to get a link to your Google dashboard where you can obtain a v3 API key. One you have the key code, enter it in the API Key v3 field of the Actions palette.