What the Action can do: This Action lets you do the following:
- It lets you set up an automated sitemap submission service so your site is regularly submitted to search engines to reflect new content added since the last time the sitemap was submitted.
A Sitemap file is an xml file which can be submitted to search engines so they can be given information about the page structure and links of your site. Previously, this was something which needed to be done manually after the site had been uploaded and at regular intervals thereafter, but now Freeway 5.5 has made the process a lot simpler and quicker.
The new Site Mapper Actions can be set to create and upload the xml file with the rest of your site files and particular pages can have their details submitted at set frequencies or with a specific priority. You can also choose which search engines you wish to submit the Sitemap file to.
Applying the Site Mapper Folder Action
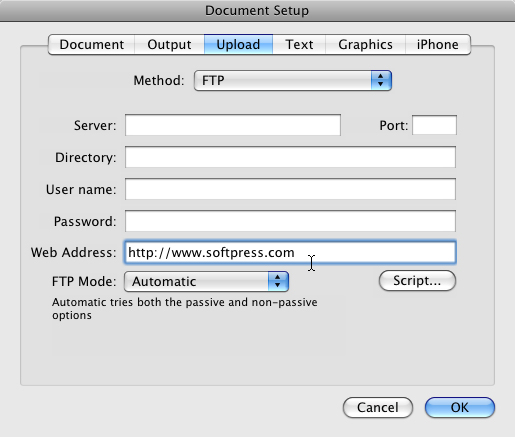
You need to apply the Site Mapper Action to the Site Folder in your Freeway file. First, however, you will need to enter the web address (where the site will eventually be available once it is uploaded) in the Upload panel of the Document Setup dialog. If you apply the Action without entering a web address you will see a prompt in the Actions palette telling you to set up the URL.To enter the URL go to File>Document Setup, click on the Upload tab, enter the URL in the Web Address field and click OK.
After setting up the URL the Actions palette you can now select the Site Folder in your Site Panel (the folder at the top of list of site pages, immediately underneath the line below the Master page(s). To do this, select the Site Folder, go to Page>Folder Actions and choose Site Mapper from the list.
After the Folder Action has been applied, you will see an alert in the Actions palette telling you that you need to apply the Site Mapper File Location Action to a page in your site (this is so the sitemap file will point to a specific page).
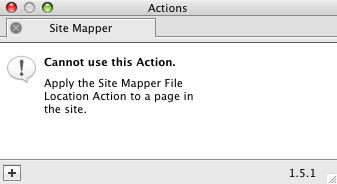
Select the page you want to use as the main sitemap page in the Site Panel (this is normally your home page), go to Page>Page Actions and choose Site Mapper File Location (note that there are no options for this Action in the Actions palette). Now you can set up the Site Mapper Folder Action by selecting the folder which has the Action applied.
In the Actions palette you will see a few options. The XML sitemap checkbox lets you switch on or off the generation and uploading of the Sitemap file.
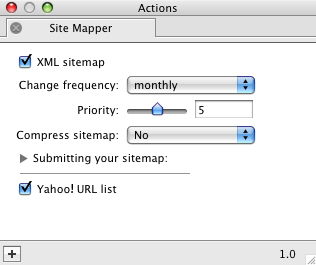
Below this is a popup and slider to set the frequency and priority for all the pages in your site (if you want to use frequency and priority settings for individual pages, you can use the Site Mapper Page Action, which is mentioned later).
There is an option for compressing the Sitemap file into a gzip archive, which is best used for large sites as it can reduce the server bandwidth and required resources.
Below this is a panel (closed by default) which you can open by clicking on the disclosure triangle to the left of Submitting your sitemap to reveal a list of internet search engines and some options for submitting the file – which will be covered later. Leave this panel closed for now.
Finally, there is an option to submit a Yahoo URL list, which will create another file (called urllist.txt). This does a similar job to a Sitemap file, but is specific to Yahoo. This is best left switched on unless you have good reason for doing otherwise.
Submitting your Sitemap
It’s best to apply the Site Mapper Action as you are working locally and then, once the site has been uploaded, you can submit the Sitemap to the search engines. To do this, select the folder which has the Site Mapper folder Action applied in the Site Panel in Freeway and open the Submitting your sitemap panel.By default you will see that the list of search engines are checked by default (you can uncheck individual ones if you wish). Check the checkbox to the left of Yes, the site has been uploaded to the web server (which will make the button below active), then click the Submit site map button. This will “ping” the checked search engines to notify them of the location of your Sitemap file.
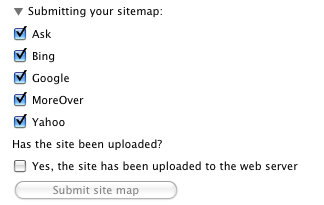
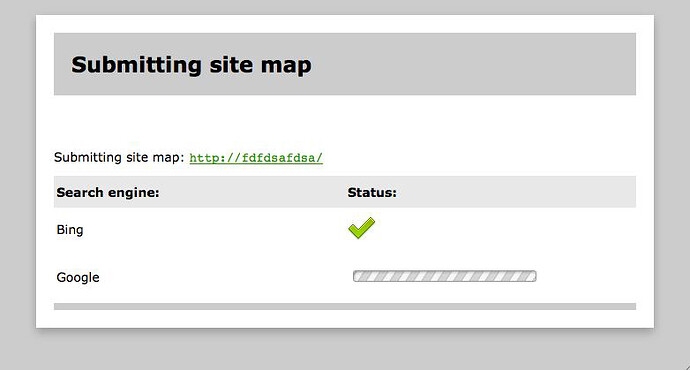
Clicking the Submit site map button will open a browser window where you will see the progress of notifying each of the search engines. Once the process is complete you can close the browser window.
Applying frequency and priority to individual pages
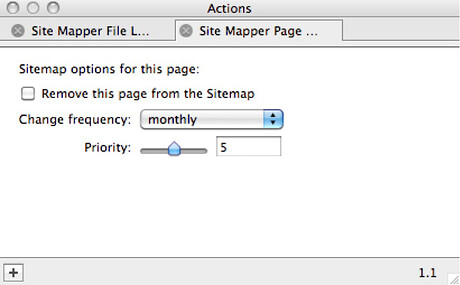
Applying the Site Mapper Action to your Site Folder will generate a Sitemap file for your entire site which has the same settings for every page. You can, however, use different settings for specific pages of your site by applying the Site Mapper Page Action to those pages.To do this, go to your page then go to Page>Page Actions and choose Site Mapper. The Actions palette for the Site Mapper Page Action is a cut-down version of the Folder Action you applied to the Site Folder.
Any frequency and/or priority settings made in the Site Mapper Page Action will over-ride those settings made in Action applied which has the Site Mapper Action applied.
Excluding specified pages from the Sitemapper Action
There may be times when you wish to exclude specific pages of your site from the .xml file generated by the Sitemapper Action. A new option has been added to the Sitemapper Page Options Action in Freeway 5.5 which can now do this on each page you wish to exclude.- Make sure nothing is selected on your page and go to Item>Actions and choose Sitemapper Page Options.
- Check the Remove this page from the Sitemap checkbox to exclude the page (see screenshot above).
